首先应确定master和slave上都安装了Flume,如果slave上没有,可以将master上的传过去
scp -r /opt/flume/ root@slave1:/opt/
配置一级Flume
在master上创建netcat-avro.conf,意思是一级flume从444端口收集信息,再从555端口以avro格式发到二级flume
cd /opt/flume/conf
vi netcat-avro.conf
=>
a1.sources = r1
a1.channels = c1
a1.sinks = k1

a1.sources.r1.type = netcat
a1.sources.r1.bind = master
a1.sources.r1.port = 444

a1.sinks.k1.type = avro
a1.sinks.k1.channel = c1
a1.sinks.k1.hostname=slave1
a1.sinks.k1.port = 555

a1.channels.c1.type = memory
a1.channels.c1.capacity = 100
a1.channels.c1.transactionCapacity = 100

a1.sources.r1.channels = c1
a1.sinks.k1.channel = c1
<=
配置二级Flume
在slave上创建avro-logger.conf,意思是二级flume从555端口收集信息
cd /opt/flume/conf
vi avro-logger.conf
=>
a1.sources = r1
a1.channels = c1
a1.sinks = k1

a1.sources.r1.type = avro
a1.sources.r1.bind = slave1
a1.sources.r1.port = 555


a1.sinks.k1.type = logger

a1.channels.c1.type = memory
a1.channels.c1.capacity = 100
a1.channels.c1.transactionCapacity = 100

a1.sources.r1.channels = c1
a1.sinks.k1.channel = c1
<=
启动一级和二级Flume
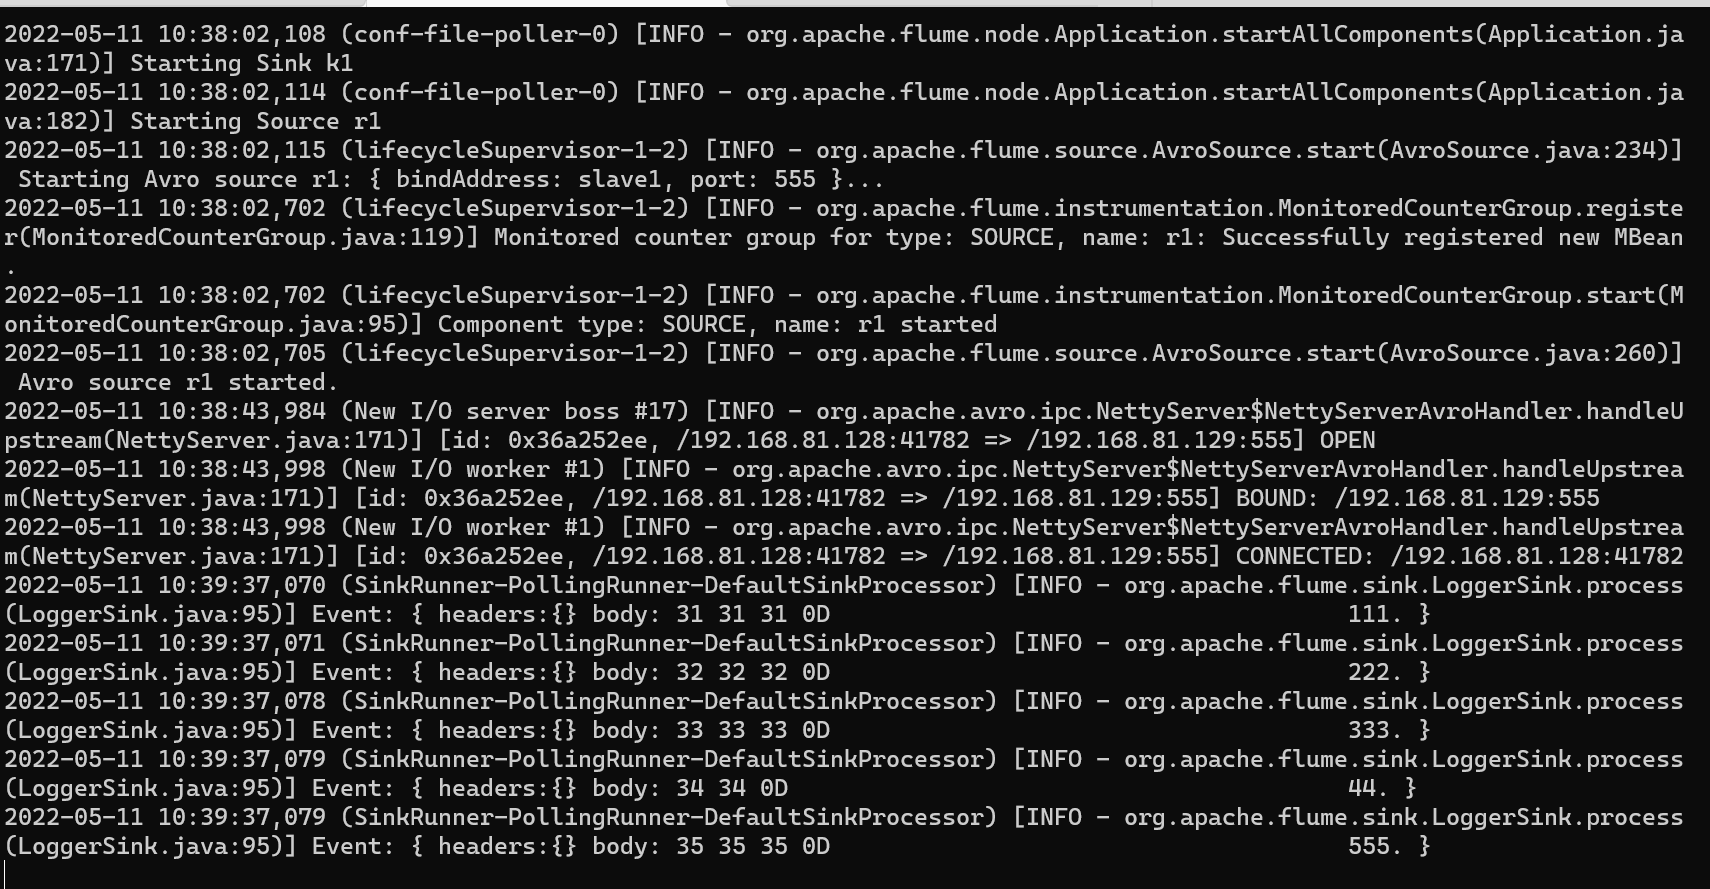
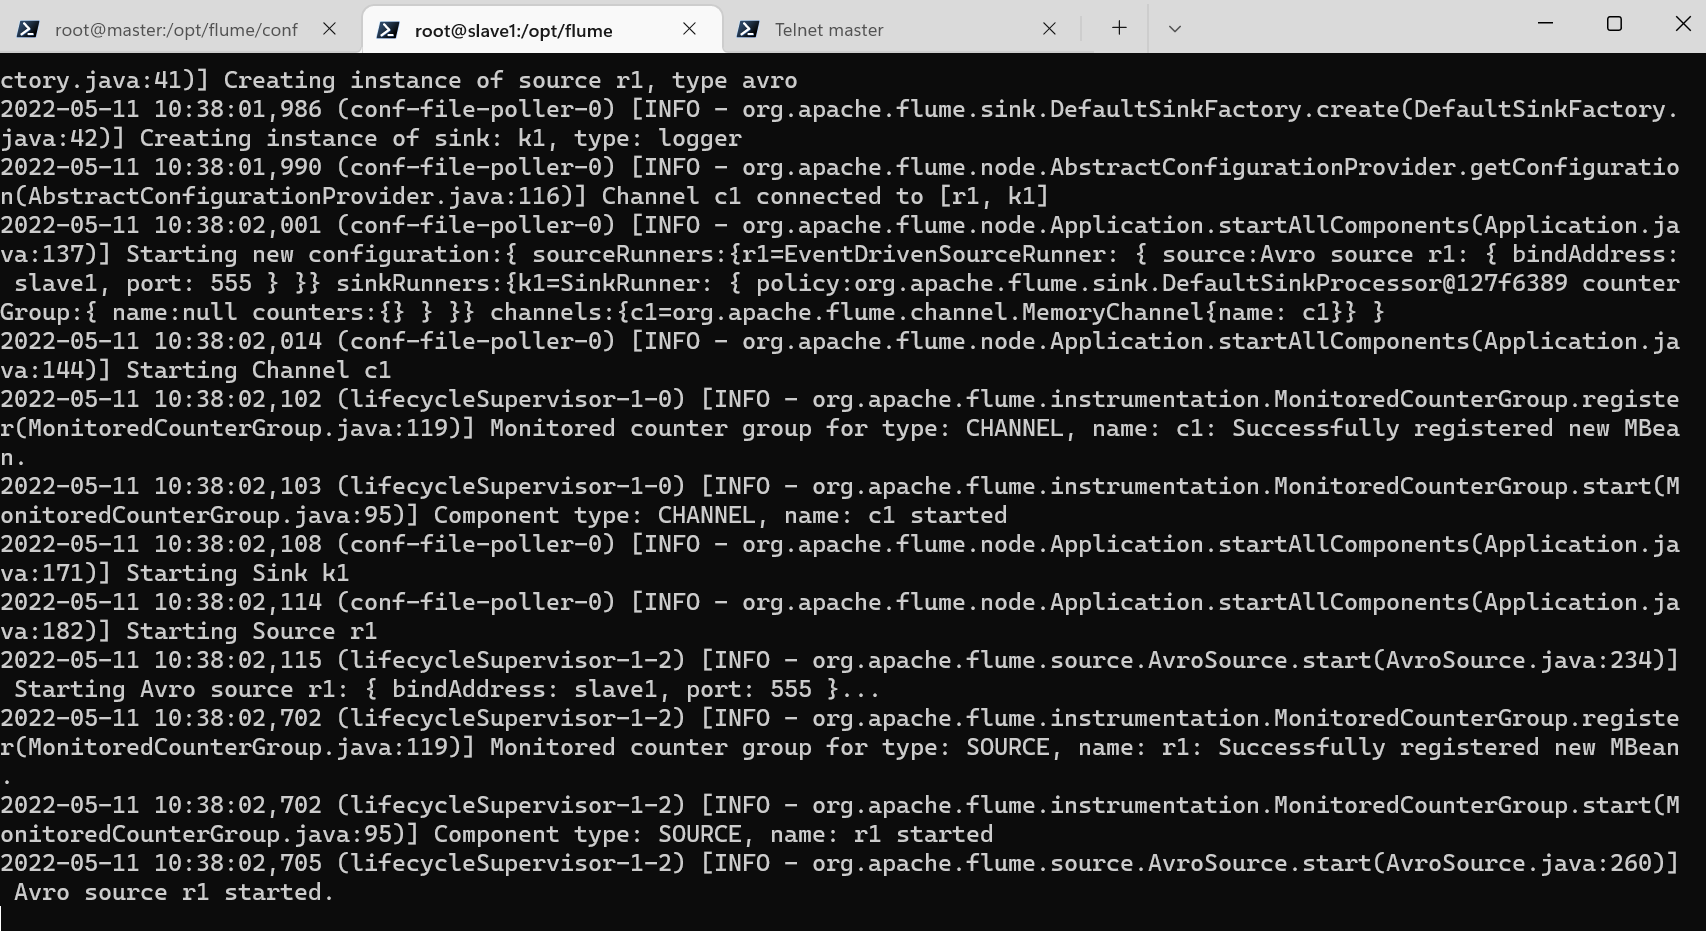
首先在slave上启动二级Flume
cd /opt/flume
bin/flume-ng agent --conf conf --conf-file conf/avro-logger.conf --name a1 -Dflume.root.logger=INFO,console
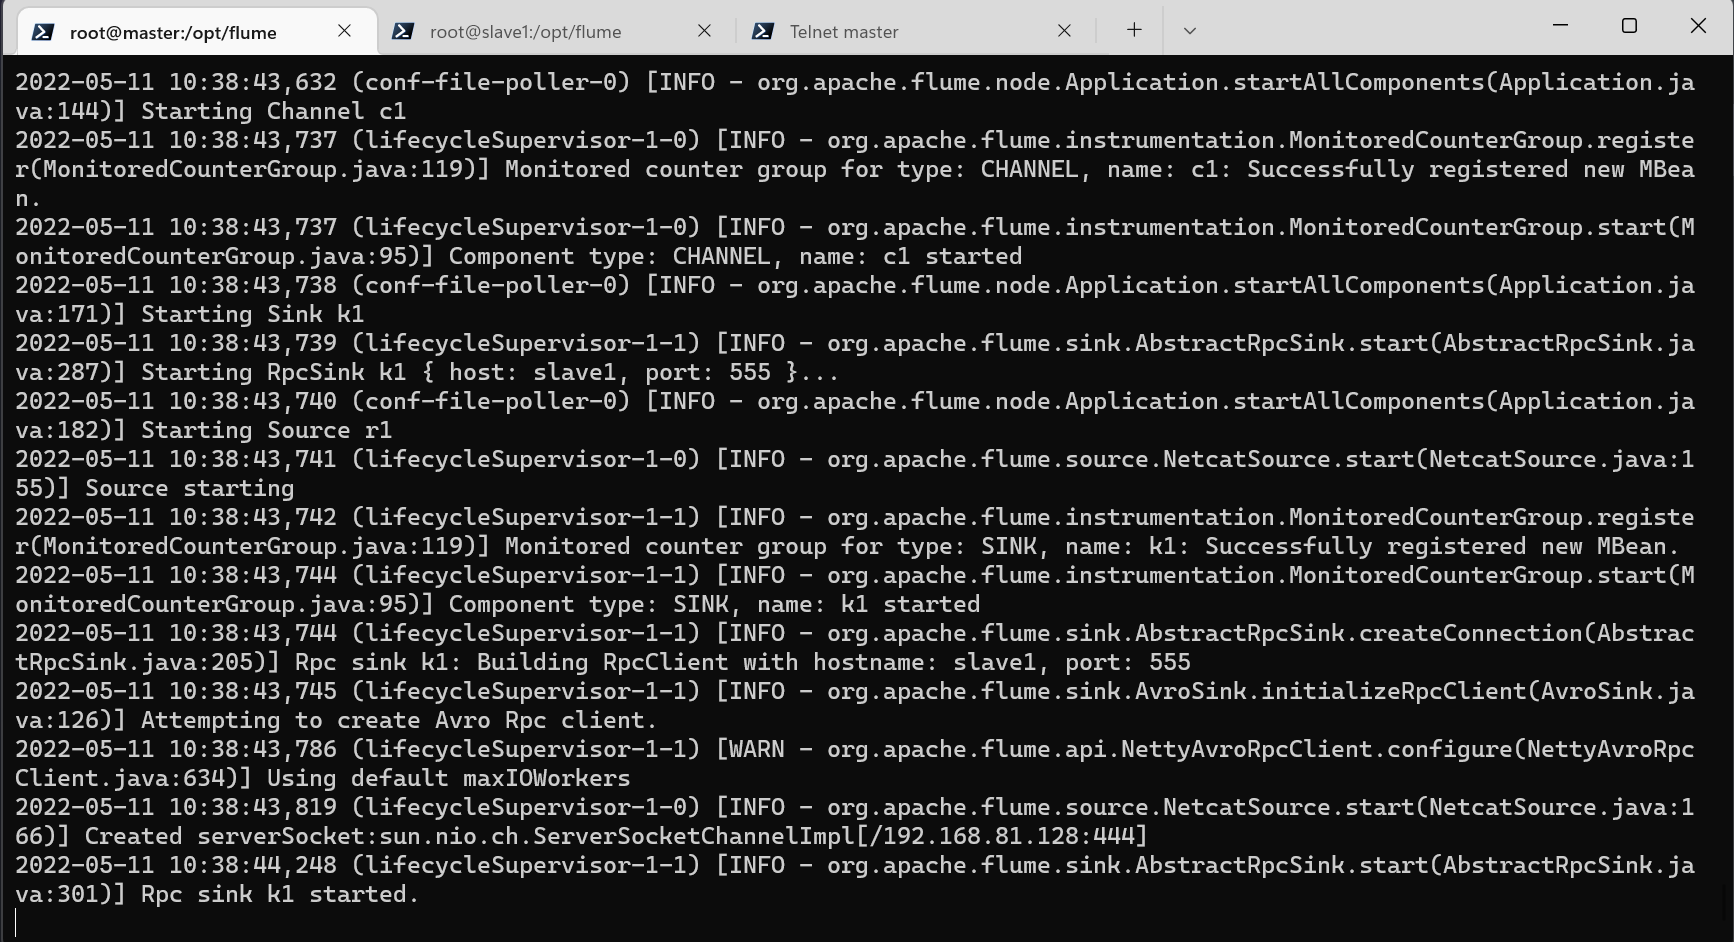
接着在master上启动一级Flume
cd /opt/flume
bin/flume-ng agent --conf conf --conf-file conf/netcat-avro.conf --name a1 -Dflume.root.logger=INFO,console
测试
使用telnet命令连接master
telnet master 444
并在telnet中输入数据
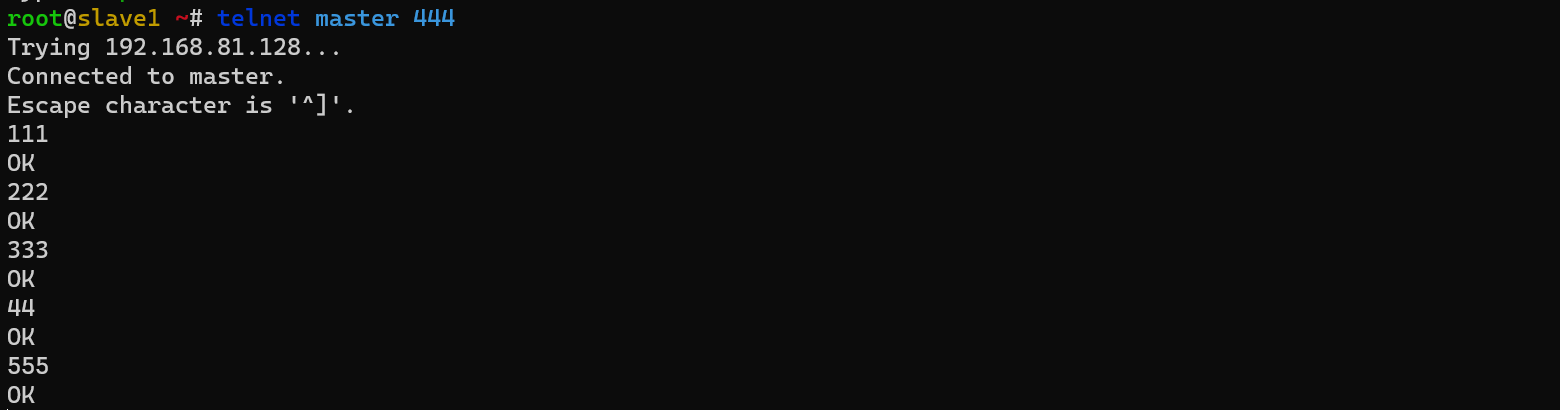
可以看到slave的二级Flume节点接受到了数据